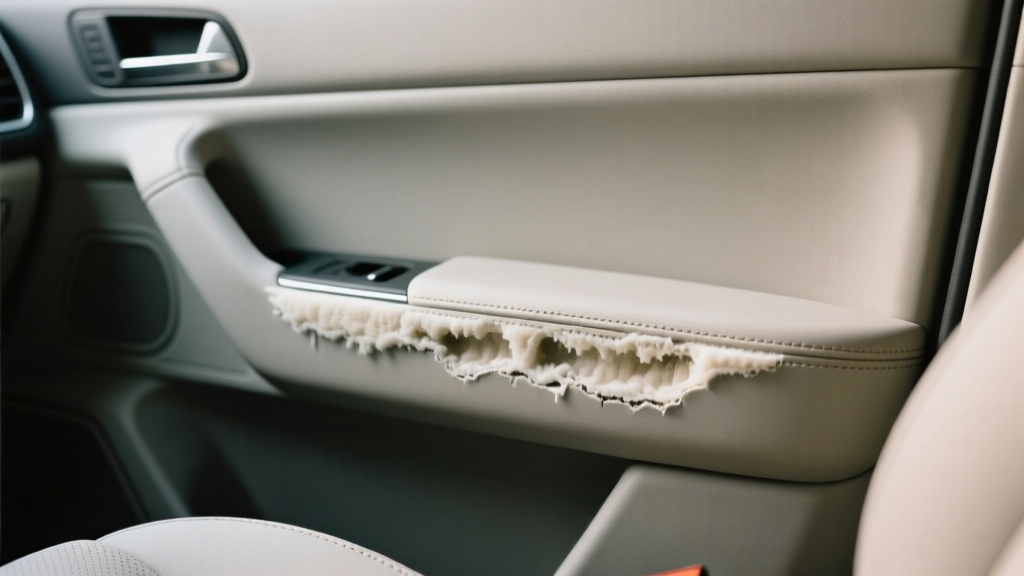
Commercial Vehicle Foam Edge Replacement (2026)
Commercial vehicles live a harder life than most passenger cars. Drivers slide in and out dozens of times a day, tools get tossed on seats, vinyl gets baked by the sun, and foam gets crushed by long hours behind the wheel. Over time, one of the first areas to fail is the seat foam edge?the bolster or perimeter foam that supports the seat cover and keeps you comfortably centered.
When the foam edge collapses or crumbles, the symptoms are hard to ignore: sagging side bolsters, wrinkles that won?t smooth out, a seat cover that looks ?loose,? and a driving position that feels uneven. In fleet work, that can mean driver fatigue, faster wear on the upholstery, and a cab that looks older than the odometer suggests. Replacing foam edges is a cost-effective interior repair that can restore comfort and extend the life of the seat cover.
This guide walks you through how foam edge replacement works on common commercial vehicle seats (work vans, pickups, box trucks, and heavy-duty cabs), what tools and materials you?ll need, step-by-step instructions, and the mistakes that cause most DIY repairs to fail early.
What ?Foam Edge? Means (and Why It Fails)
Seat foam edges are the raised sections along the outer perimeter of the seat cushion and seatback?often the side bolsters. They keep the seat cover tensioned, support your thighs/hips, and protect the upholstery from rubbing against hard frame edges.
Common failure points
- Driver-side outer bolster (most common): repeated entry/exit crushes foam.
- Front seat cushion edge: knees and tool belts compress the leading edge.
- Seatback side bolsters: frequent twisting and leaning breaks foam down.
- High-wear corners where the upholstery clips or hog rings anchor the cover.
What causes foam edge deterioration
- Compression set: foam stays permanently flattened after years of load.
- UV and heat: especially in vinyl-heavy work trucks, heat accelerates brittleness.
- Moisture: wet clothing, spills, and humidity can weaken foam and adhesives.
- Friction: loose seat covers rub, creating more movement and faster breakdown.
Diagnose Before You Buy: Foam vs. Cover vs. Frame
Not every ?lumpy seat? is a foam edge problem. A quick inspection can save time and money.
Signs you likely need foam edge replacement
- Bolster feels soft or hollow compared to the other side.
- Seat cover looks baggy at the edge even after tightening fasteners.
- You can feel the metal seat frame through the outer edge.
- Foam flakes or powder appear under the seat cover.
Signs the issue may be something else
- Broken seat springs/suspension mat: seat sags in the center, not just the edge.
- Loose listing wires or broken hog rings: cover shifts and wrinkles broadly.
- Bent frame: seat sits unevenly or rocks; foam replacement won?t correct this.
- Seat heater pad damage: you feel hot spots or dead zones; plan for a heater pad inspection while you?re in there.
Replacement Options: OEM Foam vs. Aftermarket vs. Repair Build-Up
You?ve got three realistic routes for commercial vehicle seat foam edge repair. The best choice depends on your budget, how long you?ll keep the vehicle, and how rough the seat?s daily use is.
Option 1: OEM seat foam (best fit, higher cost)
- Pros: exact shape, correct density, factory channels for listing wires/heaters.
- Cons: cost can be high; availability varies for older fleet vehicles.
- Best for: newer trucks/vans you?ll keep for years or want ?like-new? feel.
Option 2: Aftermarket molded foam cushions (strong value)
- Pros: usually close to OEM fit; affordable; widely available for popular models.
- Cons: density and fit can vary by brand; may require minor trimming.
- Best for: daily work vehicles where comfort and cost both matter.
Option 3: Foam edge build-up/patch repair (budget-friendly, skill-dependent)
- Pros: cheapest; ideal when only the outer bolster edge is damaged.
- Cons: if poorly shaped or glued, it can feel lumpy and wear quickly.
- Best for: localized bolster collapse or temporary fleet repairs.
Tools and Materials Checklist
Commercial vehicle seat covers are usually secured with hog rings, J-channels, Velcro, or plastic clips. Having the right tools makes the difference between a clean repair and a frustrating afternoon.
Basic tools
- Socket set and Torx bits (seat bolts vary by make/model)
- Trim removal tools (plastic pry tools help prevent damage)
- Needle-nose pliers (for old hog rings and clips)
- Hog ring pliers and hog rings (common on many cloth/vinyl seats)
- Marker or chalk (for alignment marks)
- Utility knife or electric carving knife (for shaping foam cleanly)
- Scissors and straightedge
Materials
- High-density upholstery foam (typically 1.8?2.8 lb density for bolster repairs; firmness varies)
- Foam adhesive (spray contact adhesive designed for foam)
- Scrim foam or thin dacron wrap (helps smooth transitions under the cover)
- Optional: burlap or edge guard fabric (adds abrasion resistance where cover rubs)
- Optional: replacement listing wire (if yours is rusted/broken)
Safety items
- Gloves (foam and old hog rings can be sharp)
- Eye protection
- Mask/respirator if using spray adhesive in enclosed areas
Step-by-Step: Commercial Vehicle Foam Edge Replacement
The exact procedure varies by seat design, but the workflow below covers most commercial truck and van seats. If your seat has side airbags, treat this as an airbag-related repair and follow OEM procedures carefully.
1) Prep the vehicle and workspace
- Park on a flat surface and set the parking brake.
- If the seat has side airbags, disconnect the battery and wait at least 10?15 minutes (follow manufacturer guidance) before unplugging seat connectors.
- Move the seat to access front and rear mounting bolts.
- Take photos of connector routing, clip locations, and upholstery attachment points. These photos save time during reassembly.
2) Remove the seat (recommended for best results)
- Unbolt the seat from the floor using the correct socket/Torx bit.
- Tilt the seat and unplug electrical connectors (heaters, occupancy sensor, airbags, power controls).
- Lift the seat out carefully?commercial seats can be awkward and heavy.
Real-world tip: If you?re working on a fleet van with limited time, you can sometimes pull the seat cover partially without removing the seat. It?s faster, but shaping foam and getting clean cover tension is harder. For a first attempt, removing the seat is worth it.
3) Open the seat cover and expose the foam
- Flip the seat upside down on a clean bench or blanket.
- Locate the attachment method:
- Hog rings: cut or unbend them with pliers.
- J-channels: separate the interlocking plastic edges.
- Velcro/listing strips: peel carefully to avoid tearing fabric backing.
- Work slowly around the cushion until you can peel the cover back enough to access the damaged foam edge.
4) Evaluate the damage and choose your repair approach
- If the bolster foam is crumbled or missing chunks, plan on a patch build-up or foam edge replacement section.
- If the foam is uniformly collapsed across the cushion, consider replacing the entire molded cushion for better long-term comfort.
- If you see a sharp frame edge or broken wire cutting into foam, fix that first (bend back, pad it, or replace the offending part).
5) Remove loose foam and prep the surface
- Brush away crumbling material until you reach solid foam.
- Trim ragged edges with a sharp knife to create a clean bonding surface.
- Dry-fit your new foam piece to confirm thickness and shape before applying adhesive.
6) Build and shape the new foam edge
For localized foam edge replacement, you?ll usually layer foam and shape it to match the original bolster contour.
- Cut a base patch that matches the missing area, slightly oversized.
- Test fit and mark alignment points with a marker.
- Apply foam-safe contact adhesive to both surfaces (seat foam and patch), let it tack per the product directions, then press firmly.
- Layer as needed: It?s better to build up with two thinner layers than one thick block if you need a smooth contour.
- Shape the bolster:
- Use an electric carving knife for clean, controlled cuts.
- Finish with light trimming to blend the transition into the existing foam.
- Add a smoothing layer (scrim foam or dacron wrap) over the repair to prevent a visible ridge under the upholstery.
Real-world example: On a high-mileage delivery van, the driver-side outer bolster often collapses while the rest of the cushion remains usable. A two-layer build-up (firm base + slightly softer top layer) can restore support without making the bolster feel like a hard ?block? under the cover.
7) Reinstall the cover and restore proper tension
- Pull the seat cover back into position, aligning seams and any listing strips.
- Reattach listing points (hog rings, Velcro, or channels) in the same order you removed them.
- Work from the center outward to avoid wrinkles and uneven tension.
- Make sure the cover isn?t pinched and that edges sit evenly around the perimeter.
8) Reinstall the seat and verify function
- Reconnect all electrical connectors and route wiring exactly as original (avoid pinch points).
- Bolt the seat back in and torque fasteners to spec if available.
- Reconnect the battery if disconnected.
- Confirm seat movement, heater function, occupancy sensor operation, and airbag warning light status.
Product Recommendations and What to Look For
For commercial vehicle interiors, durability matters more than ?extra plush.? The goal is supportive foam with clean cover tension.
Foam selection tips
- Density vs. firmness: density (lb/ft�) relates to durability; firmness (ILD/IFD) relates to feel. For bolsters, pick a foam that?s durable and firm enough to resist repeated entry/exit.
- High-wear bolsters: choose higher-density upholstery foam and consider a thin protective wrap layer.
- Heat resistance: use adhesives labeled for upholstery/foam with good temperature tolerance for hot cabs.
Adhesive comparison (practical guidance)
- Spray contact adhesive (foam-safe): fastest, even coverage; ideal for large bonding areas and smoothing layers.
- Brush-on contact cement: strong bond, more control in small areas; slower and messier if you?re not careful.
- Avoid: general-purpose glues not designed for foam (they can melt foam or fail under heat).
When a full molded cushion is the smarter buy
- The cushion is sagging in the center, not just the edge.
- Multiple areas are crumbling or the foam is brittle throughout.
- You need to restore a ?factory? seat shape for a tighter cover fit.
Common Mistakes to Avoid
- Skipping battery disconnect on airbag seats: risk of warning lights or worse. Follow OEM safety steps.
- Using the wrong adhesive: some adhesives soften foam or let go in summer heat, causing the repair to shift.
- Not shaping enough: a foam patch left square will telegraph through the seat cover as a lump or ridge.
- Overbuilding the bolster: too much foam makes the cover overly tight, stressing seams and hog ring points.
- Reusing damaged hog rings/clips: weak attachments lead to loose covers and faster wear.
- Ignoring sharp frame edges: your new foam will be cut the same way the old foam was.
- Poor alignment: if seams aren?t centered before fastening, the seat will look twisted even if the foam work is good.
Practical Tips for a Clean, Long-Lasting Repair
- Warm the cover slightly (sunlight or a gentle heat source) to make vinyl more flexible for reinstallation?don?t overheat.
- Replace in pairs when needed: if one bolster is repaired but the opposite side is also weak, consider reinforcing both for balanced feel.
- Add an abrasion barrier at high-rub points (thin fabric layer between foam and cover) on work-truck seats.
- Keep the cab cleaner than you think you need to: grit acts like sandpaper inside folds and seams, accelerating wear.
- Document your process: photos of ring locations and wire routing speed up future repairs across a fleet.
FAQ: Commercial Vehicle Foam Edge Replacement
How long does a foam edge replacement take?
For a first-time DIYer, plan on 2?4 hours for a localized bolster repair and 3?6 hours if you?re replacing a full cushion or dealing with stubborn seat cover attachments. Once you?ve done one seat, the second one is usually much faster.
Can I replace foam edges without removing the seat?
Sometimes, yes?especially on simpler seats with accessible J-channels. But for clean shaping, proper cover tension, and safe handling of wiring/connectors, seat removal is usually the better approach.
Do I need to replace the seat cover too?
Not always. If the cover seams are intact and the material isn?t torn through, foam repair can restore the fit. Replace the cover if you have ripped seams, worn-through panels, or stretched material that won?t tension properly even with good foam.
What foam should I use for a work truck seat bolster?
Look for high-density upholstery foam designed for seating (not craft foam). For bolsters that see heavy entry/exit wear, choose a durable, supportive foam and smooth it with scrim foam or dacron wrap to prevent visible edges.
Will this fix a seat that feels like it?s ?hammocking? in the middle?
Foam edge replacement helps side support and perimeter shape. If the seat center is sagging, the issue may be the cushion?s core foam, suspension mat, or internal support wires. In those cases, a full cushion replacement (or suspension repair) is the more reliable fix.
Why did my repair feel good at first but get lumpy later?
The most common causes are inadequate adhesive cure, poor blending/shaping of the foam edges, or using foam that?s too soft for a bolster. Reopening the cover, re-shaping, and adding a smoothing wrap layer usually corrects it.
Next Steps: Make the Repair Stick
If your commercial vehicle seat is showing bolster collapse or loose upholstery around the perimeter, foam edge replacement is one of the best comfort-per-dollar fixes you can do. Start by inspecting the seat cover attachments and the foam condition, decide whether you need a localized patch or a full molded cushion, and take your time shaping and smoothing the repair so it disappears under the cover.
Ready to tackle the rest of your cab refresh? Explore more practical interior repair guides, upholstery tips, and product explainers at carinteriormix.com.